How Often Do My Furnace Filters Need Changing?

Despite nearly everyone knowing about furnace filters, they remain one of the most neglected furnace maintenance tasks. One of the problems is simply remembering how often they need changing, and the last time you did it. To help solve the conundrum, here is some information on how frequently you should change your furnace filter.

The Short Answer

The overly simplified, really short answer is every 90 days. However, the full answer is a little more complex as there are several factors that affect this frequency. The first factor is your furnace filter’s thickness. The 90-day recommendation is for 1- and 2-inch filters. If you have a thicker model, the filter life extends.

For 3- and 4-inch filters, plan for a replacement about every six to nine months. If you have the larger 5- or 6-inch filters, they will need replacing every nine to 12 months.

Why Changing Your Filter is Important

You may be questioning why it’s so important to change your filter, and why this gets so much attention in the HVAC industry. To understand this, you have to understand the basics of how your system works.

To heat your home, your system must be able to draw air in and then push it back out. Without this air circulating, your system will produce heat, but it’ll stay contained in the furnace and never heat your home.

Your filter is at the beginning of the process, filtering contaminants out of the air before they enter the furnace. This protects the internal components from collecting a large number of contaminants, which can damage the system and reduce its service life.

Considering Your Air Quality

Another critical consideration is your air quality, which is affected by how many contaminants are floating around in your air. The worse the air quality, the more quickly your air filters will clog and need changing.

Things that lower air quality are pets, improperly managed humidity, and the season. You may experience worse air quality in the winter when the air is naturally drier. While spring may have more contaminants outside, those particles have to make their way into your house. Winter, on the other hand, creates more contaminants inside if you don’t properly humidify your home.

That means that your filter is more likely to clog up sooner over the cooler months. Instead of assuming how often you need to change your filter, just check it monthly. This builds in a frequent routine, so it’s easier to remember. It also ensures that you replace your filter as soon as it’s dirty enough to cause an airflow restriction. While checking it, gently vacuum off the intake side of the filter to help extend its life and improve efficiency between changes.

Properly Sizing Your Furnace Filter

It’s important to get the right size filter to fit your furnace. There are three dimensions you need to fit properly.

First, you want to match the length and width of the filter. If the filter is too big, it simply won’t fit. If it’s too small, it’ll allow unfiltered air to flow past it.

Then there’s the filter’s thickness, which indicates the amount of filtering material. Despite what may seem like room to fit a thicker filter in your furnace, it’s important to use the manufacturer’s recommendation. Using a filter that’s thicker than recommended may restrict the amount of air flowing through your system, causing too much strain and reduced efficiency.

Signs You Have a Clogged Filter

If you forget to change your furnace filter, your system may give you some signs that it’s clogged and needs replacing. First, you may notice your system is not pushing out as much air as normal. You may also notice your home doesn’t feel as warm as it should for the temperature setting.

Additionally, your furnace may run longer cycles than normal, which should be about 10 to 15 minutes. This happens when your system can’t produce or circulate enough heat. You may also notice more dust around your home than normal.

People around Franklin rely on Dugan Air Heating Cooling for reliable heating and air conditioning service. Our team specializes in the installation, maintenance, and repair of a large range of heating and air conditioning systems. We also provide indoor air quality services. Call to schedule a maintenance or repair appointment with one of our NATE-certified technicians to keep your furnace running strong all winter.

Reasons to Change Your HVAC Air Filters in Winter

Reasons to Change Your HVAC Air Filters in Winter

Winter is approaching in the Indiana area, meaning it’s time to get your heating system up and running. If you notice the heat is not coming out the way you want, it could be due to a clogged filter causing reduced airflow or short cycling. 

Regular air filter changes are an important part of maintaining a healthy and efficient heating system, as clogged filters can considerably affect your indoor comfort. If you’re not sure how to replace furnace filters, contact Dugan Air. One of our HVAC technicians can do it for you or show you how it’s done. 

Why Winter Is a Crucial Time To Replace Furnace Filters

Winter is when you need your heating system to work consistently and efficiently. You don’t want to have to bundle up indoors — your home should stay at a comfortable temperature so you can take off your winter jacket and relax. 

When you don’t change your furnace filter, your entire heating system is affected. It becomes less efficient because it has to work harder to heat your home. This causes unnecessary wear and tear on the furnace, which can shorten its lifespan. 

Changing the filter is part of good furnace maintenance. It’s easy enough to do yourself, but when you schedule a full maintenance call with Dugan Air, we’ll do it for you. 

Top Benefits of Changing Your Furnace Filter In Winter

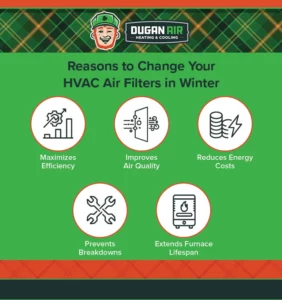
Changing your furnace filter in the winter is a low-cost maintenance task you can do yourself or hire an HVAC professional to do for you. Changing your furnace filter during the winter months are can benefit your system by:

Why should you change HVAC air filters in Winter

  • Keeping your furnace running at peak efficiency with proper airflow
  • Maintaining better air quality in your home, as clean filters can more effectively trap particulates 
  • Lowering your energy bills because the furnace won’t have to work as hard to provide consistent heat
  • Preventing potential future breakdowns
  • Extending the furnace’s life by reducing the energy it has to put into creating heat

It’s worth the small effort to learn how to change (or clean) your furnace filter. The benefits will save you money and keep you more comfortable in the long run. 

Signs It’s Time To Change Your Furnace Filter

Some common signs it’s time to change the furnace filter include: 

  • A buildup of dust or a noticeable discoloration on the filter 
  • Dust settling on furniture around your home
  • The system isn’t working properly (short-cycling, uneven heating, etc.)
  • Vents smell like burning dust
  • Airflow from the vents is weaker than usual
  • It’s been more than three months since you’ve changed your filter
  • You notice an unexplained Increase in energy bills

When you’re ready to change your filter, turn the furnace off to avoid accidents. Working on an appliance while it’s running can cause injury or electrical shock. Trying to change the filter while the furnace is on will cause the air pressure from the blower to dislodge dirt and particulates from the dirty filter and suck it into the HVAC system. 

How Often Should You Replace Furnace Filters In Winter?

Experts like our team at Dugan Air recommend that you change the air filter at least once every three months or more, depending on the following:

  • Type of filter
  • Number of pets in your household
  • Number of individuals living in your home
  • Level of air contamination and construction near your house

Your HVAC system stays in constant use during the winter months, so it’s a good idea to inspect the filter once per month to check for excess debris buildup. If the existing filter is coated with dust and debris, you should replace the filter even if it has not reached the end of its recommended service life.

Types of Furnace Filters To Consider for Winter

High-efficiency pleated filters last longer than a standard fiberglass filter but are also more expensive. In most cases, selecting a filter with a MERV (Minimum Efficiency Reporting Value) rating of 8 to 11 is best, but the filter you need also depends on your furnace size and type. 

If you’re not sure which type of furnace filter is best for your home, schedule a maintenance appointment with one of our HVAC technicians. We’ll guide you on how to care for your furnace and which filters will work best. 

What Happens if You Don’t Change Your Filter In Winter?

During winter, your HVAC system suffers wear and tear because it runs around the clock to keep you comfortable. Heat pumps use a heat exchange mechanism to cool or heat your house’s air. The air gets pulled into other spaces in your residence by the system’s fan. Air filters help stop dust and other debris from accumulating in ducts, and they safeguard the heat exchanger at the center of your heating system. 

The longer the filter remains in place, the more dust, allergens, pollen, bacteria, pet hair, and other fine particles get trapped, obstructing the filter, impeding airflow, and reducing efficiency. 

Clogged filters can cause other problems, including:

  • High energy bills: A dirty filter makes it difficult for air to flow through the ducts on the way to the heat exchanger, making your system work longer and harder to get your home to the desired temperature.
  • Increased health risks: Pet dander, bacteria, mold spores, and other particulates collect and get distributed around the home (especially problematic for people with allergies or respiratory conditions).
  • Unexpected system failure: Your HVAC system will have to work harder and longer to circulate air through a dirty filter, creating a constant strain that could cause it to break down.

Call Dugan Air for All Your HVAC Needs

Changing the air filter during the winter will keep your household warm and safe. If your heater develops problems, turn to the HVAC experts at Dugan Air. Our NATE-certified technicians will inspect your unit, identify any problems, and perform the necessary repairs to keep your Franklin home warm and safe. 

We also offer heating, cooling, indoor air quality, and smart thermostat services in Franklin and the surrounding areas. Call us today for more information about the above services or to schedule an appointment.

Reasons Why Your Furnace Might Be Leaking Water

Reasons Why Your Furnace Might Be Leaking Water

Noticing water pooling up around your furnace can be a worrying experience, but the odds are fairly good that this problem is not nearly as serious as it may appear. Your furnace might leak or have water pooling around it for several reasons, such as leaks, clogs, or damage. Fortunately, most aren’t all that serious and can be fixed fairly easily. Read on to learn more about why your furnace leaks occur and what to do if it happens in your home. 

Understanding Water Leakage from Your Furnace

Leaks are much more common with newer, high-efficiency furnaces than conventional ones. The reason behind this lies in their design and operation. Also known as condensing furnaces, high-efficiency units contain two heat exchangers instead of just the one found in conventional furnaces.

This secondary heat exchanger allows these furnaces to extract more energy from the fuel by burning it longer and more efficiently. The added time also means that the combustion gasses created have more time to cool down before being expelled through the exhaust system. When these gasses cool down, they create condensation, which exits through a drain line, drain pan, and floor drain. If something malfunctions within the system and the condensation does not drain properly, it can drip out of your furnace and leak into your home. 

Conventional furnaces are much less likely to leak as they don’t produce condensation. If the system leaks, the cause is almost always related to an improperly designed or poorly fitted vent pipe. These problems can cause the combustion gasses from the furnace to stay inside the vent pipe rather than immediately being funneled outside the home. When this happens, the gasses can cool and lead to condensation. 

Common Reasons for a Furnace Leaking Water

Why is your furnace leaking water

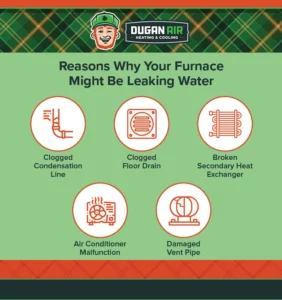
Clogs, leaks, or damage to your furnace’s components can cause water to leak out instead of draining away as it should. Some of the most common culprits of a leaking furnace include:

  • Clogged condensation line: If the condensation line is blocked, water can build up inside the drain pan and overflow out of the pipe. This same issue can also cause the drain pan to rust and develop leaks. 
  • Clogged floor drain: If the floor drain is clogged, water pools around the furnace instead of going down into the sewage system.
  • Broken secondary heat exchanger: A damaged secondary heat exchanger can cause excess condensation to overwhelm the drainage system and pool around the furnace. When this is the case, you’re usually only left with one option: to have the furnace replaced.
  • Air conditioner malfunction: If you notice water leaking around your furnace after running your air conditioner, condensation from your AC could be the real culprit. If you run your furnace and air conditioner within a short time of one another, it can overwhelm the drain pan and cause it to overflow.
  • Damaged vent pipe: If you have a conventional furnace, a broken or improperly installed vent pipe can cause condensation to accumulate inside the exhaust system and eventually leak out. 

What to Do If Water is Leaking from Your Furnace

Turn the unit off immediately if you notice water dripping or pooling around your furnace. Once you shut the unit down, use a dry towel to soak up as much water as possible to prevent damage to the surrounding area. Next, inspect the unit for visible signs of damage or clogged components.

If you’re unsure what’s causing the leak, it’s best to contact a reputable technician to assess and repair your furnace. They have the tools and experience to identify the root cause and repair it to prevent further damage. Often, the repair will be an easy fix, and your furnace will be back up and running before you know it.

How to Prevent Water Leakage in Your Furnace

The best way to prevent furnace leaks is to schedule annual maintenance with a qualified HVAC company. They’ll perform a complete inspection, cleaning, and tune-up of the system to ensure everything works correctly. If they uncover any issues that could lead to a potential leak, they’ll fix them before they progress. 

Call Dugan Air for Furnace Repair in Indiana!

If you notice water leaking around your furnace, the expert HVAC technicians at Dugan Air Heating & Cooling are on-call and ready to help! Our technicians will quickly diagnose and repair whatever issues you’re facing to restore your home’s comfort as soon as possible. 

We also offer emergency HVAC services for customers in Franklin and the surrounding areas. From furnace and air conditioner installation, maintenance and repairs, we can handle it all. We also offer service for ductless HVAC systems, heat pumps, and indoor air quality. Contact our team today to schedule an appointment!

Frequently Asked Questions

Can a dirty filter cause a furnace to leak water?

If your air filter is dirty, it can stop air from flowing through the furnace properly and cause the coils to freeze. When the coils eventually thaw, the excess water can overwhelm the drain pan and cause condensation to leak out of the furnace.

How much water should be coming out of the furnace?

A high-efficiency condensing furnace should produce around one to five gallons of water per day, depending on your local climate and humidity levels. If you notice a significant increase in water volume, contact our team for an inspection to rule out any issues.

The Thermostatic Expansion Valve

For any refrigeration system, it is the flow of the refrigerant that determines if it will operate efficiently. The refrigerant flow has to be regulated to ensure that the right amount required at any given time is available in the evaporator. The thermostatic expansion valve (TEV) is the most common device that regulates the refrigerant flow in the system. The amount of refrigerant released into the evaporator depends on the outlet temperature and pressure of the operator.

How the Thermostatic Expansion Valve Works

The Thermostatic expansion valve (TEV) forms an essential component of a refrigeration cycle. Other vital parts include condensers, compressors, and evaporators. As part of its throttling function, the TXV lowers the pressure of the refrigerant as it flows by, causing it to expand. Low refrigerant pressure leads to the liquid’s low temperature, which allows it to absorb cold room heat through the evaporator.

Throttling devices are designed to ensure that all the refrigerant evaporates to prevent the escape of the liquid into the suction port. If the liquid gets to the suction port, it could damage the compressor, leading to the breakdown of the whole system. With the TEV, the refrigerant flow is automatic and determined by the sensing bulb.

Essential Parts of a Thermostatic Expansion Valve

The sensing bulb is the focal point of the TEV. It is fixed on the suction pipe on the lower end of the evaporator. It has a special liquid that corresponds to the refrigerant used in the system. When the sensing bulb detects increased temperatures at the evaporator exit, the fluid in the sensing bulb expands, pushing down the diaphragm. The diaphragm is made of a solid and supple material that can flex to pressure the valve needle.

The superheat setting spring’s function is to counteract the pressure of the valve needle. Once the diaphragm is pushed down, the spring goes back to create constant tension. External forces from the bulb and spring and temperature from the refrigerant determine the evaporator pressure in the equalization area. Depending on the balance of the surrounding conditions, the valve will open or close to maintain a stable superheat.

The valve needle opens, allowing refrigerant into the evaporator. The size of the opening at the outlet varies as the hand moves up and down. The variation in the opening size is vital in controlling the amount of refrigerant let into the evaporator.

5 Common Thermostatic Expansion Valve Issues That Require Troubleshooting

1. Poor Valve Installation

A poorly installed valve will not function well. When you engage someone who is not a professional, the chances are that you will end up with inadequately brazed fittings and poorly mounted bulbs. Other signs of improperly installed valves include bends in the tubing and dents in the system.

2. Improper Sensor Bulb Mounting

Sensor bulbs are supposed to be tightly mounted to remain in fixed positions. A loose sensing bulb may lead to TEV overfeeding and potentially cause flooding in the compressor. Poor insulation or a lack of insulation means that the bulb can sense ambient temperature and send the wrong signal.

3. Valve Blockage

When the valve has a blockage, it means the evaporator may have to operate under low pressure, which will negatively impact its efficiency. A blocked valve may not readily detect and adequately respond to superheat changes. Some valves have removable inlet filters that can be removed and cleaned.

4. Low Bulb Charge

Low bulb charge can also cause underfeeding. An inadequate charge will not allow the bulb to have enough pressure that can drive the spring pressure to allow the valve to open. Low valve charge may cause inefficient operations in the evaporator, potentially leading to a breakdown of the entire system.

5. Superheat Setting Issues

Depending on ambient conditions, the superheat settings may not correspond to the needed operation parameters. Each specific TEV has a special rate of change per turn of the superheat spindle. Check if the settings correspond to the TEV and adjust accordingly. Such setting adjustments may need the expertise of HVAC specialists.

Engage a Reliable and Reputable Service Company

The services at Dugan Air Heating & Cooling are available to residents of Franklin and the surrounding area. We specialize in AC installation, repairs, maintenance and furnace and heat pump repairs, replacement, and maintenance. Our team of highly skilled, experienced, and licensed technicians stops at nothing to exceed your expectations. Contact Dugan Air Heating & Cooling today.

6 Furnace Tips to Keep Your Home Safe

Many homeowners use furnaces to keep their homes warm during the cold winter months by heating the indoor air. During the summer season, these heating units assist in circulating conditioned air from the cooling system. A furnace is a perfect option if you require constant air circulation to keep your house warm and comfortable.

While a furnace is a reliable way to heat your home, it can become hazardous if you are not careful. Furnace maintenance is one of the best ways to ensure that your appliance is operating correctly and safely. To protect your family and your home, follow the furnace safety tips and tricks discussed below.

1. Test the Smoke and Carbon Monoxide Alarms

Some furnace issues can cause fire hazards. Carbon monoxide leaks are also among the most common threats that malfunctioning furnaces can pose to homes. Accidents can happen. However, you can easily keep your household safe by preparing adequately for these potential problems. With that in mind, ensure you replace batteries on fire and carbon monoxide alarms at least once every year. Schedule this maintenance at the onset of the winter season because the alarms will warn you of any furnace glitches.

You can place the two alarms in the same room as your furnace and test them so you are certain they’ll warn you of carbon monoxide poisoning or fire. To enhance your home’s safety when using a furnace, install smoke and carbon monoxide detectors on all levels of your home.

2. Change the Filters

It is crucial to change your filters regularly. Clean filters help your furnace work with great efficiency and to prevent dust circulation in your home. A dirty filter can cause many avoidable problems, including efficiency and safety issues. It can also lead to performance problems that can result in furnace failure or breakdown. Change the filters at least once every one to three months in the winter when you mostly use the furnace. However, if you use the furnace more often or if you keep pets, you might need to change the filters more often.

3. Clear the Area Around the Furnace

Keeping the area around the furnace clear can help you reduce the chances of fire hazards. Your furnace requires fresh air to function properly. If the unit doesn’t get adequate air, it might suck up oxygen in your house, endangering your entire family household.

Moreover, anything blocking airflow may also cause your furnace to heat your home unevenly. As a result, your furnace will work extra harder and will increase your utility bills. You can open floor registers and clear all obstructions to keep the heat evenly spread throughout your living space while boosting your furnace’s efficiency.

4. Keep Flammable Items Away

Keep any items or products that can catch fire away from the heat generated by your furnace. Some homeowners utilize their furnace space for laundry or storage. If your furnace chamber has more than one purpose, ensure that you keep this space well-organized. Any item or product left near the heating appliance becomes a safety hazard.

If you normally use your furnace space as a laundry area, avoid hanging your clothes near the furnace. Also, keep all your cleaning products in airtight containers. That’s because ammonia fumes can corrode the heat exchanger of your furnace. It would be best if you kept the area around your heating equipment clear for safety and efficiency.

5. Schedule Annual Furnace Maintenance

An annual furnace inspection and maintenance is important to ensure your unit works properly, safely, and efficiently. During the inspection, your licensed technician will check your unit for other potential problems, such as carbon monoxide leaks, and any other issue that could lead to safety hazards.

6. Hire Professionals to Perform Furnace Repairs

If you encounter a problem with your furnace before the maintenance period, don’t try to solve the issue yourself, regardless of how handy you are. Allow your heating expert to give you a professional opinion and to make the necessary repairs despite how simple the problem may seem. That’s because one small mistake can lead to a fire or to carbon monoxide buildup in your home.

Partner With the Heating Experts Today

Follow the six tips above to provide your household with a warm and safe environment during the entire heating season. These actions will also make you feel at ease knowing you have a safe and efficient furnace during the winter season. If you notice uneven heating in your home or if you feel something is wrong with your heating equipment, contact the professionals at Dugan Heating Cooling. These technicians will inspect your unit, identify all the problems, and make the needed repairs to keep your house warm and safe.

We also offer cooling, air quality, HVAC support, smart thermostats, and new construction services to the residents of Franklin, IN. Contact us now for any of the above services or to book an appointment online.

Is My Air Conditioner Running Efficiently?

When temperatures rise, you are constantly thankful for the relief your air conditioning brings. But your AC doesn’t seem to be working quite the same as you remember, and now you’re wondering about its efficiency. Here are some simple ways to identify when your system is no longer efficiently cooling your home and requires service.

Time Your Cycles

When your system runs shorter or longer cycles, you have a problem with its operational efficiency. Ideally, your system’s cycle will last between 15 and 20 minutes and will cycle two or three times an hour.

Time your cycle during normal operating conditions, meaning not during extreme heat and when it is only working to maintain temperature. If it runs longer than 20 minutes or is extremely short, you have an efficiency problem and need service. Either problem will increase your utility costs and the wear on your system.

Check the Temperature

The temperature coming from your vents should be 15 to 20 degrees cooler than the air cycling into the system. Any less than that, and you have either a problem with your refrigerant or a dirty evaporator coil.

Checking the temperature differential is rather easy if you have a meat thermometer. First, let it sit out in the room with an air return duct and record the ambient room temperature.

Next, carefully put the probe in an output vent with your unit running, and you can feel the cool air coming out. Simply compare the two temperatures and make sure it is at least 15 degrees different. Just be careful not to drop the probe into your ductwork.

Get a Sense for Air Volume

While you’re checking your temperature, also check your air volume. For this, you simply need to feel with your bare foot or hand by placing it in front of an output vent.

An efficiently running HVAC system will have noticeable air movement from your vents. It is this air movement that works to cool your home, not just the compressor running.

Lack of airflow can be caused by a physical obstruction, like a dirty filter or evaporator coil. A mechanical failure, such as a bad blower motor, may also reduce airflow.

Check Your Air Filters

Your air filters are the most common form of an airflow obstruction, being that their entire job is collecting airborne contaminants. You should change your filters regularly, about every 90 days for the standard 1-inch filter. However, poor air quality may necessitate more frequent changes.

Plan to check your filter monthly so that you get a sense of how quickly it clogs. Gently vacuum the dirty side, known as the intake side, to help extend its useful life.

Inspect Your Condensing Unit

Your air conditioner has two primary units, the indoor evaporator unit and the outdoor condensing unit. The outdoor unit is responsible for transferring heat from the refrigerant to the air outside. Anything preventing that unit from transferring the heat properly causes the system to run inefficiently.

The primary thing you want to check is for anything preventing air from flowing through the condensing coils. This could be branches, weeds, grass, or any other debris blocking the area around the unit. As a rule of thumb, keep everything at least 12 inches away from your unit.

Loud or Unusual Sounds

While you’re looking for inefficiencies, listen to your system run, both inside and outside. Any loud or unusual sound indicates a problem that is likely causing cooling inefficiency.

For instance, a squealing sound may be one of your fan motors going bad. This could potentially restrict how much air the fan is drawing through the system.

Likewise, banging, rattling, or clanking from your condensing unit may indicate something broken in the compressor. A bad compressor may not regulate the refrigerant’s pressure properly.

Consider the Age

The average air conditioner will last 10 to 15 years with proper maintenance. As your system ages, some components become suboptimal, leading to reduced operational efficiency.

If your system is over 10 years old, begin the conversation with your HVAC technician about a replacement. Starting the process now allows you more control over the process, rather than waiting for a catastrophic failure.

Dugan Air has been the air conditioning service provider of choice for people around Franklin for over 14 years. Our NATE-certified technicians are sought out for their reliable heating and AC installation, maintenance, and repairs. Call to schedule your air conditioning service with one of our friendly technicians today.

4 Ways to Maximize AC Efficiency at Home

While your AC unit might be performing the way you expect it to, there are always ways to improve its operational efficiency. Not only does this lead to better temperature control indoors, but it also results in lower electricity bills. Here are four ways you can make the best use of your AC unit.

1. Minimize Gaps Where Air Can Escape

If you’re running your AC, make sure all windows and doors to unused rooms are closed. Cool air will escape to the outside through these gaps and, at the same time, hot air from the outside will flood your home. This results in your AC having to work harder to regulate temperatures. Aside from keeping windows and doors closed, you should also seal slits off with tape.

2. Use Your Thermostat Correctly

Constantly adjusting your thermostat forces your AC to run longer than it needs to. This can lead to more frequent on-off cycles. Set your thermostat to the recommended 78-degree temperature and forget about it. You can also program your AC thermostat to switch on before you get home from work or school and shut down automatically when no one’s home.

3. Change Your AC Filter

Obstructed airflow leads to operational inefficiency. A clogged filter not only reduces airflow and increases the workload for your AC, but it also leads to lower indoor air quality. Change your filters at least every two months or clean them regularly with a vacuum or soft brush. In addition to the filter, the condenser fins should also be cleared of any dirt and debris.

4. Get Preventative Maintenance

It might cost money, but it’s far cheaper to have preventative maintenance done to your AC unit than it is to repair or replace parts once your AC starts to malfunction. Hire an experienced, certified, and insured HVAC technician, like Dugan Air Heating & Cooling, to perform a comprehensive assessment of your AC unit.

Contact Us Today

At Dugan Air Heating & Cooling, we have been serving Franklin, IN, and the surrounding neighborhoods for many years now. Aside from preventative maintenance, we also offer indoor air quality checks and upgrades, mini-split system work, and thermostat installation. Contact us today for more information!

How to Clean Your Air Conditioner

A clean air conditioner will work more efficiently and last longer, saving you money. A professional HVAC maintenance plan will ensure proper cleaning of your AC unit before the weather gets warm, but you can benefit from learning the process yourself. This guide will show you how to clean an air conditioning system.

Getting Started

Cleaning an air conditioner involves cleaning around the unit, cleaning the condenser coils, cleaning the filter, and cleaning the ducts. There are some simple steps to follow when cleaning your AC unit.

1. Gather Supplies

First, you need to collect the necessary supplies to get the job done. Supplies include:

  • Coil cleaner
  • Lubricant
  • Hose
  • Vacuum cleaner with brush attachment

2. Get Ready to Work

Next, you need to prepare yourself. Put on work clothes, gloves, goggles, and comfortable shoes. You want to ensure that you give yourself plenty of time to do a thorough job.

3. Turn Off Power to the AC System and Thermostat

You need to turn off power to your cooling system to prevent the risk of electric shock. In addition to all breakers connected to your air conditioner, be sure to disconnect the power to your thermostat as well.

Cleaning Outside

The two main tasks when cleaning the outside unit are clearing away any organic blockages and cleaning the condenser coils. First, you need to remove any leaves or debris in and around your outside unit and trim nearby plants to minimize the risk of a future blockage.

Next, you need to clean the outside unit itself. Apply the cleanser to the coils using a spray bottle and allow it to work for five minutes. You will then spray the cleanser off with the hose, avoiding soaking the motor. Wear gloves, and do not use the oil cleanser on your indoor unit since it contains dangerous fumes.

Use the soft brush attachment on your vacuum to clean the fins. Over time, fins can get slightly distorted and reduce airflow. If any fins are bent, now is the time to straighten them.

Cleaning Inside

You now need to point your attention to the inside unit to clean the evaporator coils and filter. Evaporator coils soak up the heat and moisture and send it to the condenser coils to be removed. The filter collects dust in the air to improve the air quality.

You’ll need to open the access panel to the indoor unit with a screwdriver to expose the evaporator coils. You can clean the evaporator coils using a number of methods, including:

  • Vacuum with a soft brush attachment
  • Compressed air
  • Soap and water
  • Chemical-free cleansers

You also need to clean the filter. You’ll remove the filter, which is now accessible from the open access panel, and use the same cleaning techniques you used on the evaporator coils, or you can soak it in water. After you finish cleaning both the evaporator coils and the filter, dry everything completely and reattach the access panel.

Cleaning the Ducts

Cleaning the ducts ensures proper airflow to every part of your house. Turn on your fan to make it easier to clean the dust away from the ducts. Lift the supply registers, and then unscrew the return air registers to remove the dust with a broom or duster with a long handle. Next, you’ll turn off the fan and ensure you turned off the power to the AC unit. Remove the air duct covers with a screwdriver and clean them. Finally, use a vacuum to clean the air ducts.

Test the Results

At this point, the air conditioner is clean. Now, you need to restore power to the system and ensure it works properly. Check your bill the next month to see if you notice any savings on your energy costs. If things didn’t work as planned, you should call for professional HVAC service.

Professional AC Cleaning

Cleaning an air conditioner requires an extensive understanding of your unit and access to the proper tools. To ensure the job gets done right, it’s best to schedule an appointment with Dugan Air.

We have over 14 years of experience providing heating and cooling services in the Franklin area. In addition to offering AC cleaning and maintenance, our team is available to assist with heating and cooling repairs and installations. Call Dugan Air today to set up an appointment or learn more about our services.

What Size Air Conditioner Do I Need for My Home?

If you’re shopping for a new air conditioner, chances are that you’re a bit overwhelmed by all of the possibilities. It’s a good thing that customers have options, but at Dugan Air Heating Cooling, we certainly understand when people seek out our help. If you’re looking for a quick overview that sheds light on what size air conditioner you’d need, you’ll hopefully find the information below helpful.

The Importance of BTUs

BTUs are used to refer to an air conditioner’s ability to remove heat from a space. BTU stands for British thermal unit, and referring to BTUs allows us to standardize the effectiveness of various ACs. Some recommendations are that a 1,000 square-foot home needs an 18,000-BTU unit. A 2,000-square-foot home may need at least a 30,000-BTU unit.

What size air conditioner do I need for my home

If you’ve heard of tonnage when it comes to AC units, that’s a reference to the history of air conditioners. Before we used modern appliances, we used ice to keep homes cool. The ice would melt as it absorbed heat from the home. Melting a ton of ice was calculated to require about 12,000 BTUs. Therefore, a 1-ton AC unit has 12,000 BTUs.

Of course, there are many factors to consider when buying an AC unit. Those factors include:

  • Climate in the region
  • Amount of shade on the home
  • Number of windows
  • Quality of insulation
  • Number of people using the space

Rely on Professionals

At Dugan Air Heating Cooling, we’re available to work with residents in the Franklin area, and the surrounding communities, on air conditioner installations. We’ve been in the industry for 14 years and work with various makes and models. We’d be happy to come to your home and do an assessment so that we can set you up with the right model. We’ll be mindful of your budget and energy-efficiency preferences, and we can answer any questions you may have. We offer heating, cooling, indoor air quality and construction services. Call us today for more information.

What Are the Major Parts of an Air Conditioner?

When the weather starts getting warm in Franklin, you depend on your air conditioner to keep your home comfortable. However, when it stops working, do you know which parts could be causing the problem and what sort of repair may be required? Here are the major components of any air conditioning system and what you can expect if they are damaged.

Air Conditioning 101

First, it is helpful to understand the basics of how your air conditioner works. While there is cold air that comes from the vents, it actually transfers heat.

As the refrigerant runs through the system inside, it absorbs heat from the air and transfers that heat to the air outside. Once it does, it cools down dramatically in order to absorb more heat and continue the cycle.

To help with the transfer of heat, the unit works on a pressure system. When you increase pressure, you increase heat. Likewise, if you drop the pressure of the refrigerant, you drop the temperature. This pressure is regulated by the compressor outside and a small expansion valve inside.

Circulating Fan

The circulating fan is what makes the air flow through your system. It actually starts by drawing in air through the intake vent and through the air filters and evaporator coil. It then pushes the air back out into your house once it is cooled.

This particular fan runs with both your air conditioner and furnace, so it experiences a lot of wear. To keep it working properly, it should be serviced during regular maintenance visits. This includes cleaning it to eliminate residual air contaminants, lubricating the motor bearings, and balancing the fan wheel.

If the motor wears out, it can be switched out without having to replace the entire system. However, it is included when most furnace units are replaced.

Evaporator Coil

The evaporator coil is inside, usually near the air handler or furnace. This is the coil the refrigerant runs through once the pressure is dropped and the refrigerant is cooled. Like the circulating fan, this should be cleaned as part of regular maintenance.

The evaporator coil is relatively fragile, so cleaning must be done cautiously to avoid any damage. If something does happen to the evaporator coil, it likely means replacing it. While you can replace just the coil, there are many instances where you are better off upgrading the entire system. If your air conditioner was manufactured before 2010, then you may still have the old R22 refrigerant. This is no longer being produced and is becoming prohibitively expensive to service.

Compressor

Outside your home is the condensing unit. The first component the refrigerant encounters is the compressor. This part increases the refrigerant’s pressure, making it easier to transfer the heat to the outside air.

The compressor can be damaged, especially if there is a small refrigerant leak and not enough in the system. Signs the compressor is bad are a lack of cold air, low airflow through the system, or growling or humming noises coming from your condensing unit.

If your compressor breaks down, you will have to replace it rather than try to repair it. This component can be replaced on its own or as part of a larger replacement project. Work with your installer to evaluate the condition of your appliance and determine what would be the most cost-effective in both the short and long term.

Condensing Coil and Fan

After the refrigerant is pressurized by the compressor, it moves into the condensing coils. It is from these coils that the heat is transferred to the outside air. The condensing fan draws outside air through the condensing coils and then vents it out through the top of the unit.

If the condensing coils are damaged, you are likely better off replacing at least the condensing unit, if not the entire AC system. The cost of replacing just the coils is relatively high due to the sheer amount of work it requires. Replacing a bundled part of the unit ends up being more cost-effective and saves you from immediate repairs.

Does your cooling system need some help? Dugan Air Heating and Cooling has provided air conditioners around Franklin with exceptional care for over 14 years. We also offer competitive AC replacement and installation, along with heating installation, maintenance, and repair. Give us a call to schedule air conditioner maintenance or repair today.

Schedule Now

"*" indicates required fields

This field is for validation purposes and should be left unchanged.